What is your style of Gothic jewellery?

So you like a bit of darkness and you’re looking for jewellery styling ideas for every occasion? I have some suggestions! I’ve been getting called Goth since I was a teenager just because of my predominantly black wardrobe. Back then it irked me because I thought I was a cool metal kid and if someone had handed me crushed velvet I would have set fire to it. Of course I grew up in small town Tasmania where anyone mildly alternative would have been labelled either Goth or Hippy (depending on your colour quotient). I’m older and wiser now, living in the eminently more accepting Melbourne / Naarm, and I’ve come to embrace Gothic because it’s an umbrella term which encompasses so many wonderful things. Personally the Gothic aesthetic that tickles me is Medieval, especially in regards to jewellery. Give me soaring pointy towers, gargoyles, stone, stained glass windows and tracery and I’m set! My jewellery does tend to reflect this but also draws inspiration from some of the many other facets of Gothic culture like pretty filigree from Victorian, bold shapes from Industrial, symbols from Traditional, a little death and mayhem from Metal, a touch of poetry from the Romantics and occasionally some sensuality from Fetish. With these tools in my belt I’ve compiled some dark accessory collections for inspiration and whatever your mood may be. Something simple for work Portal Remains Ring Attic Shadows Midi Ring Medieval Manicule Earrings Treasure Chest Locket Necklace SHOP NOW SHOP NOW SHOP NOW SHOP NOW Feeling sinister Abaddon Ring Cursed Scroll Necklace Pit Pendulum Earrings Knight Errant Pin SHOP NOW SHOP NOW SHOP NOW SHOP NOW Paint the town black Cathedral Eye Ring Balistrarias Necklace Cathedral Phantom Reflection Earrings SHOP NOW SHOP NOW SHOP NOW Seductive & dangerous Siren Talon Claw Rings Cathedral Phantom Reflection Necklace Cathedral Phantom Chandelier Earrings SHOP NOW SHOP NOW SHOP NOW Gothic ball Scutum Rex Full Finger Rings Winter Nights Necklace Fountain of Fates Earrings SHOP NOW SHOP NOW SHOP NOW SEE THE FULL GOTHIC RANGE
Create your own Gothic coat of arms jewellery
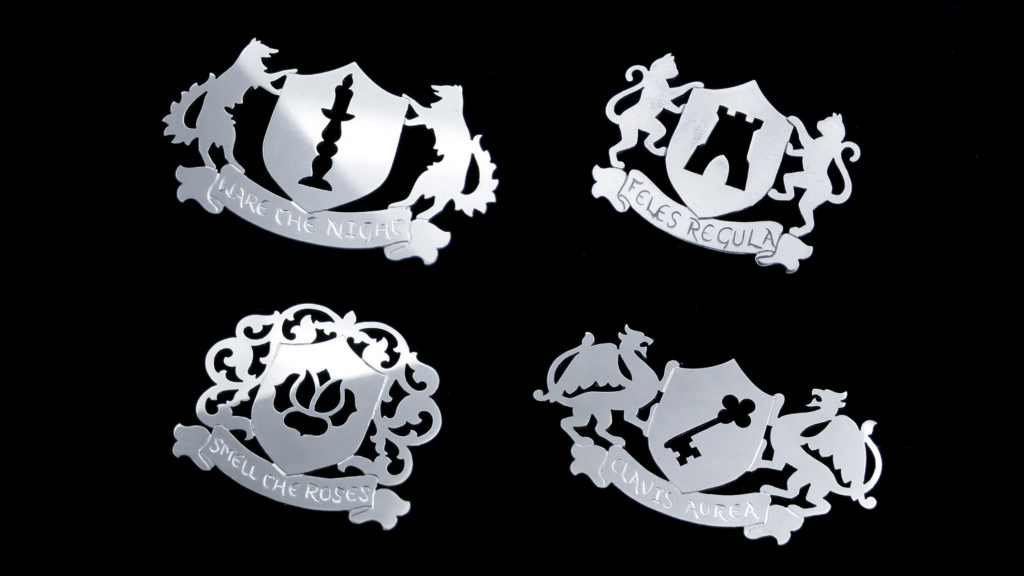
Have you ever wanted your own coat of arms? Some heraldry to proudly hang above your door or print on stationery? Here in Melbourne / Naarm, there’s a dearth of both castles and elaborate Medieval Gothic family crests and I feel like we’re missing out. Maybe large tapestries or grand carved stone fireplaces are impractical, but a small custom insignia in the form of jewellery might be more attainable. If you are fortunate enough to have a family coat of arms stretching back centuries, chances are the symbols and motto aren’t quite so relevant as they once were. Amongst many of the European Arms there’s a tendency toward featuring a Latin declaration exalting truth, pride or victory in some form (usually by God’s grace) accompanied by some kind of disfigured animal. My own Davidson family crest features a stag and the motto ‘sapienter si sincere’ (wisely if sincerely). It’s a lovely sentiment and the stag is rather majestic, but the point is that while I’m sure it was pertinent to one of my very distant ancestors, I can’t say it accurately depicts my interests and values. So what if I had my very own personal coat of arms? Perhaps one that doesn’t celebrate being a man hunting other men or animals… Pick your favourite symbol Picking a symbol and frame There’s nothing better than personalised jewellery, whether for yourself or as a gift. To have a keepsake that you know is the only one in existence and represents you as a person is a rather special feeling. Having said that, when commissioning such a piece, starting from scratch with no idea what speaks to you can be intimidating! And so when it comes to building your very own coat of arms I decided to create some options.Firstly you need a frame for your shield, some noble creatures or decoration. In this case you can choose from wolves rampant, cats rampant, foliage or gryphons rampant. Then you get to pick the symbol you feel best illustrates you. Perhaps it embodies your occupation, interests or personality? So far I have a crown, castle, rose, axe, hammer, anvil, sword, goblet, book, cat, snowflake, candle and key. Of course I’m also open to suggestions! Make up a motto Now this is the tricky bit! Under the shield is a banner designed for a hand engraved motto. So what few words describe you? Not such an easy task is it? When trying to think of something for myself I suddenly had a lot more sympathy for those medieval meathead knights and their formulaic ‘conquer or die’ maxims. Of course if you don’t have a catchy phrase, provocative proverb or clever expression, you could use that space for a name, date or location. Hell, you could choose a series of emojis if it feels right (maybe not dancing girl or something equally detailed, it’s a small space)! https://www.skadijewellery.com/wp-content/uploads/2022/09/Untitled-Sequence-01-24.mp4 And that’s all there is to it! Just 3 simple choices and you have your very own one of a kind silver keepsake perfect for yourself, as an heirloom or a personal gift which is sure to impress.If you have a different idea for the frame or symbol or maybe you’d prefer the coat of arms to take the form of a necklace or ring, just fill out the custom request form so we can discuss the possibilities. – Clare Check out these other customisable pieces Custom Monogram – Ring Medieval Manicule – Necklace Illuminated Manuscript – Necklace SHOP NOW SHOP NOW SHOP NOW
Ode to Secret Compartments in Jewellery
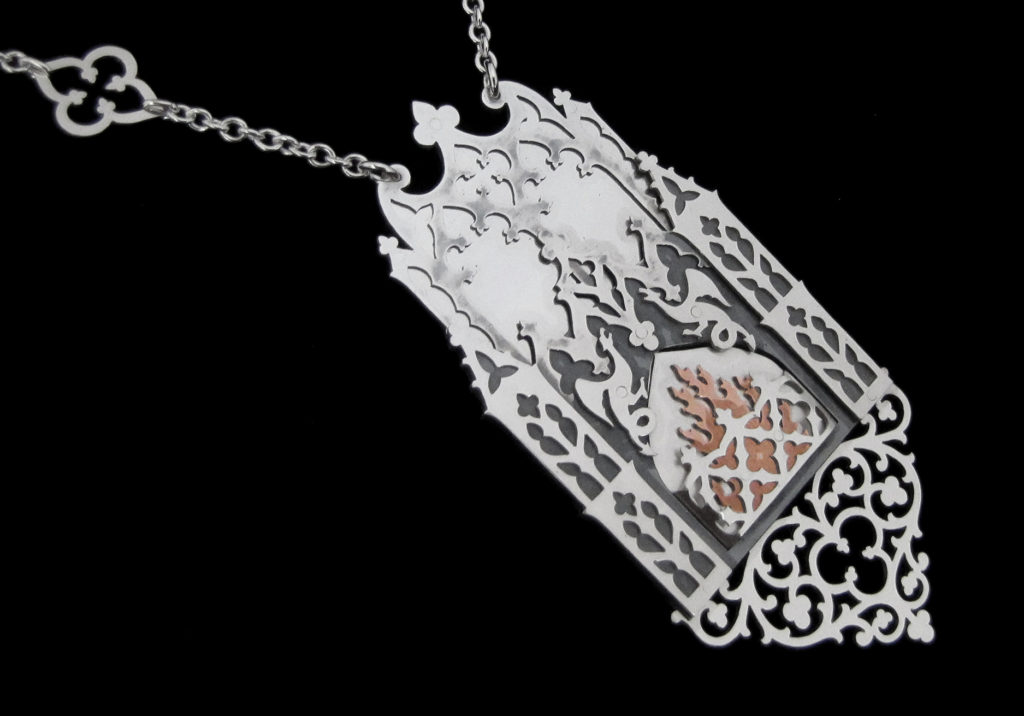
I’m a big admirer of secret compartments in jewellery (and furniture. And anything else really). Any hidden message, photo, puzzle, diorama or niche tickles me. If it’s miniature and concealed let me at it! Basically if a piece of jewellery is mysterious that greatly increases it’s value in my estimation. Secret cavities in jewellery can take many forms such as the classic locket necklace, poison ring or vial pendant but the best ones are always unique and unpredictable. Think of the magic of seeing a Fabergé egg for the first time with no clue as to it’s contents! There’s nothing better than wearing a piece of jewellery which holds a secret only you know, especially if it’s personalised.Recently I created a necklace which is my ode to secret compartments in their purest form. Not to hide a photo or message, but celebrating a hidden thing for it’s own sake. All of the pieces I cut out for the Winter Nights necklace I like to hide things… Sometimes when you’re a jewellery designer and you’re very very fortunate you might get the chance to create something just to amuse yourself. Winter is here (my favourite season) and things start to slow down, so it’s around this time every year that I take a moment to celebrate and make something entirely frivolous and joyful. This year I’ve been feeling particularly pleased with the comfort of my new house and wanted to capture that feeling embodied by the most wonderful part of Winter; sitting in front of a blazing fire on a cold dark night. But what is a grand Gothic fireplace without a secret button, a rotating stone sculpture or sconce lever? Even before my love of fantasy books and ancient castles Indiana Jones left an indelible mark.And just because it makes me happy, what you’re left with is an imposing Gothic mantelpiece and mirror, complete with rotating wyverns, roaring fire, hidden medieval weapons chamber and wrought iron style decoration. Did I miss anything? With a total of 19 individual pieces and 19 blind rivets you can understand why I don’t hide things in every piece of jewellery I make, but I do take every possible opportunity. Secret Compartment ideas So how many ways can you utilise a secret compartment? There are several different mechanisms which could be involved from cogs, rivets, springs and hinges to buttons, and actions like sliding, rotating, screwing, swinging and swivelling (and that’s just using metal!). Quite often the more complicated the mechanism the more thrilling the find (something involving a combination lock is particularly fun!). Great places to find inspiration for different ways to hide things in jewellery include puzzle boxes, furniture, fairytales, music boxes, clockwork automatons, safes and of course jewellery boxes! Simple ideas include sliding drawers and hinged doors but what if you could wind something like a jack-in-the-box? Some of the most creative people in history have worked on toys, the Transformers I had as a child were ingenious! And when it comes to the things you can conceal don’t just stick to the obvious like photos, locks of hair or engraved messages and dates. Almost anything can be miniaturised, why not try a cheeky animal figurine, a painting or a plant? Think of the things that have the most meaning to you and go from there. https://www.skadijewellery.com/wp-content/uploads/2022/06/video-1656392900.mp4 The next time you’re looking for a gift for yourself or someone else consider secret compartments in jewellery and what you could hide in them. There’s nothing more special than a present containing a personalised secret short of the giver making the gift themselves (you should also consider that if you have the time!).If you have an idea you’d like to explore and discuss simply fill out the custom request form to get in touch. – Clare Check out these other pieces with hidden compartments Winter Nights – Necklace Treasure Chest – Locket Lock and Key – Locket SHOP NOW SHOP NOW SHOP NOW Shadow Lock – Poison Ring Grim Fable – Necklace Lost Leaf – Locket SHOP NOW SHOP NOW SHOP NOW
Learning a new technique: PMC
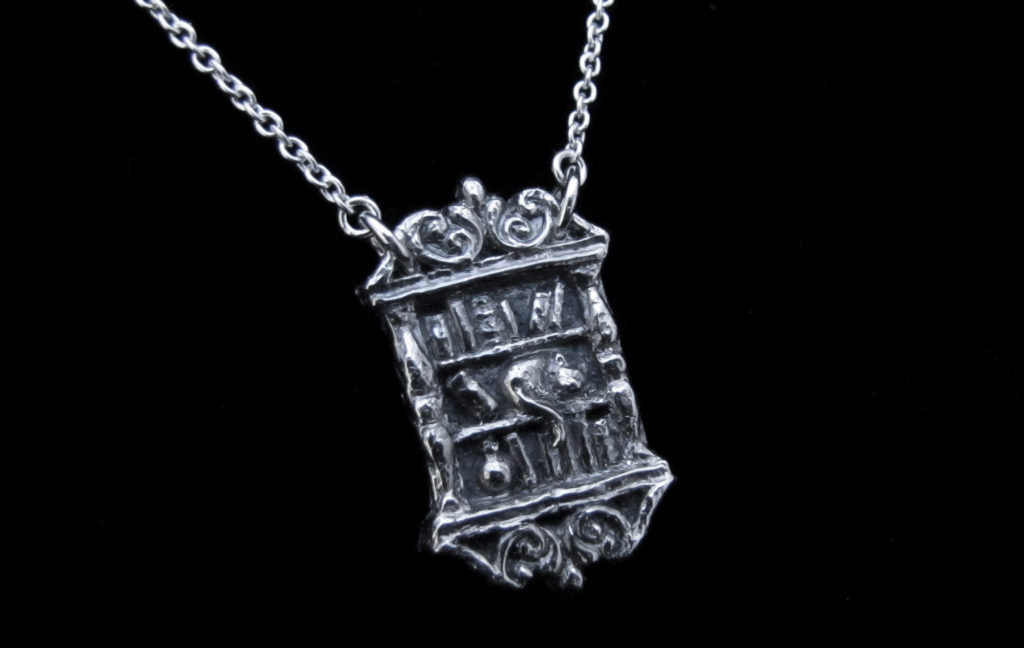
For years I’ve been curious about the magical material known as precious metal clay (PMC). Until recently I believed it was only the purview of people with fancy kilns and more than adequate ventilation but I was wrong! In the simplest of terms PMC is a clay-like substance consisting of silver particles, an organic binder and water. This means that you can sculpt, shape and mould it, let it dry then fire it just like clay. The fundamental difference being that when you fire it (in a kiln or with a torch) the organic binder is burned away and you’re left with just silver! Pure wizardry! Of course there is a small amount of shrinkage (around 10-15%) which is delightful to watch, much like Shrinky Dinks. The original sculpt for the Clandestine Library Necklace Sculpting Apart from the general novelty of working with such a fascinating material and the obvious benefit of achieving dimensionality, what I really wanted was to learn a new technique which enabled me to produce equally detailed work in less time (this may come as a surprise to many but saw piercing can be time consuming and strenuous 😉 ). This led me to the process of making a mould which I could use to make multiple items, saving me a little time and my shoulder muscles. To make the mould I first sculpted a little bookcase out of a polymer clay (yes I did make my design ridiculously tiny and detailed. Yes I did have to sculpt it with a pin. And yes, there is a cat in it. It’s in my nature). Then I created a well and covered the clay in resin in order to get a hard mould.I won’t pretend that pressing the PMC into all the nooks and crannies of the mould while it’s coated in oil then trying to get it out again before it dries isn’t a little tricky. That bit is a work in progress. Firing So this is the part which held me back for years! I was under the impression that you needed a kiln to fire the PMC when in fact if you’re just using the fine silver version you can get away with a simple torch. Revelation! The best bit is that with a torch (after drying out the piece so there’s no water left) it only takes about 3 minutes to transform a piece of clay into a silver jewel. It’s like alchemy but better.After firing (and trying very hard not to melt it) you simply clean it up and finish it however you usually would a cast piece (I like to oxidise it then use a brass brush on the highest surfaces to increase the contrast and sense of dimension). You can achieve a surprising amount of detail and it really is quite fun. However, if you’re a novice with the torch I would recommend testing out your firing technique on a small piece first as PMC is considerably more expensive than regular silver sheet or granules. https://www.skadijewellery.com/wp-content/uploads/2022/02/Untitled-Sequence-01-1.mp4 So far I’ve just tested out a couple of designs (see below) but my poor brain is overwhelmed with the possibilities. Don’t worry, I haven’t abandoned my beloved sawframe, hopefully I can use both techniques in tandem to create something truly exciting. Stay tuned! – Clare See more pieces made from PMC Clandestine Library – Necklace Timekeeper – Necklace Medieval Manicule – Necklace SHOP NOW SHOP NOW SHOP NOW Timekeeper – Earrings Medieval Manicule – Earrings SHOP NOW SHOP NOW
Treasure Exhibition
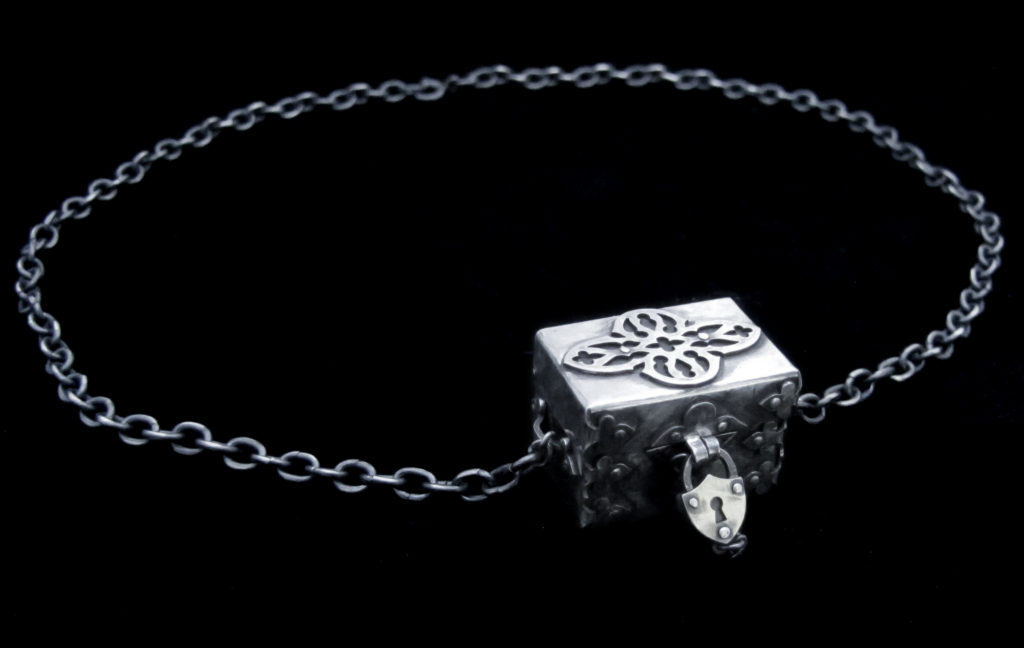
Treasure exhibition: past, present and future What does Treasure mean to you? Treasure : Something valuable that is hidden or kept in a safe place.What Treasure are you hiding in your mind? Born from the depths of our consciousness, Treasure explores the relationship between idea and creation. We’ve assembled 16 artists from Narrm, Warrang, and Meanjin (aka Melbourne, Sydney and Brisbane) to explore this idea and present to you our creations. We hope you find the Treasure you are looking for! Featuring artworks by:Midnight Kiss Jewellery | Christina Gore Jewellery | Vincent Jewellery | Emma Rea | Subtle Chains | Holla Ceramics | Gang Of Babes Photography | Serpent Rouge Jewellery | Cut Off Your Hands Jewellery | Ophelia Weeps | Skadi Jewellery Design | Halo & Hurt | Tatiana Craufurd Gormly | Cloudstreet Calling | Cybergoth | Tay Bassi From the moment I was asked to be part of the Treasure Exhibition my brain was overflowing with ideas. I couldn’t have picked a better theme myself! Then I saw all of the other incredible artists who were to be involved and I felt so honoured to participate (and like I needed to pull my socks up and create something special to avoid embarrassing myself!). To me, the things which conceal treasure are often more beautiful than the treasure itself. Whether it’s the story of the quest, the unravelling of a mystery or puzzle, hidden compartments or even the details in a receptacle for the loot. As a jeweller, obviously I’m still drawn to shiny things, but it’s the shiny things with a story that are the most compelling. My Artworks Bluebeard’s Door Sea of Monsters Guardian Earrings SHOP NOW SHOP NOW Treasure Chest Lock & Key Necklace Sanctuary SHOP NOW SHOP NOW The Treasure Exhibition will be held at Honey Bones in Collingwood on December 9th and 10th. The collection includes jewellery, ceramics, resin and photographs. It will run for one night and one day, but sales will remain online for a week. It will be ticketed (free) for covid reasons. This show will highlight the creativity of women and non binary folk, and there will be an opportunity for everyone (including allies) to attend. This will be a dry event and is proudly sponsored by Killjoy drinks. All unsold artworks are available to purchase here
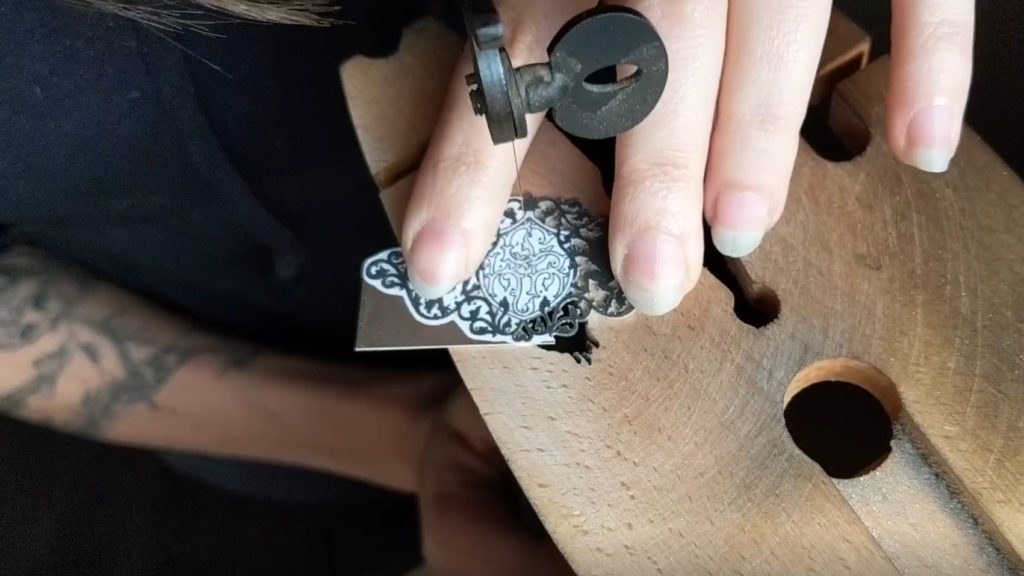
How it’s made – custom silver monogram ring video
Contemporary Gothic Jewellery Melbourne
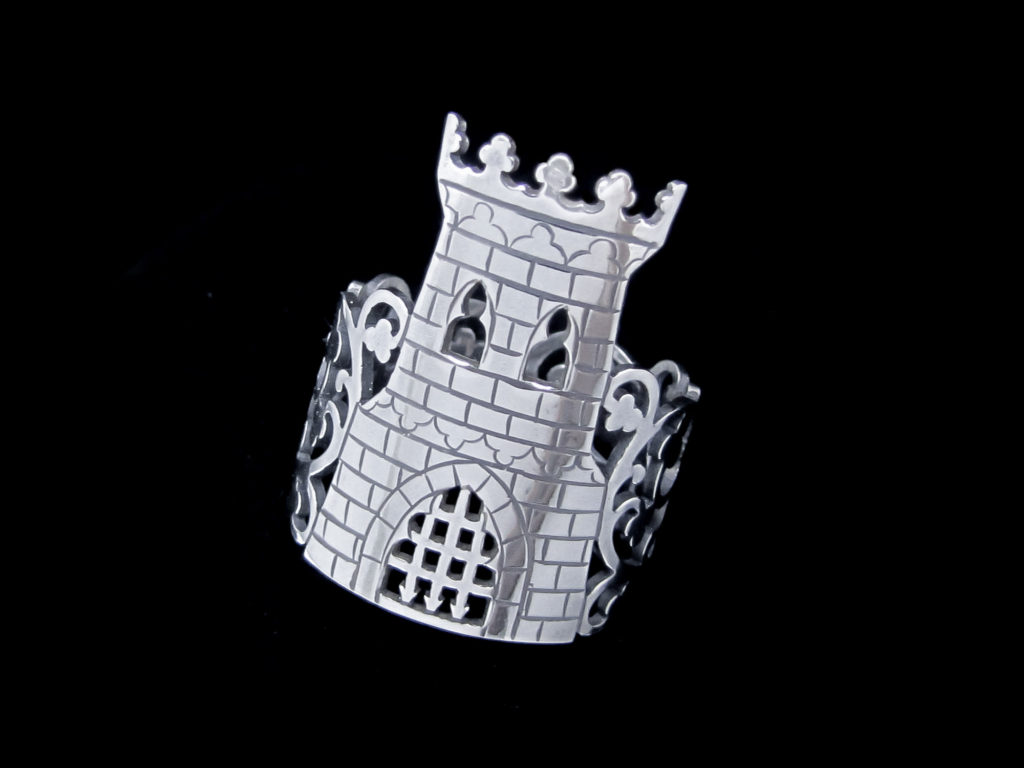
Well we’re back in lockdown again here in Melbourne/Naarm so I thought I’d use this opportunity to share with you some of my favourite local contemporary Gothic / alternative jewellers. They could really use your support during this difficult time so check them out and be impressed! We’re really spoiled for choice when it comes to Gothic jewellery in Melbourne (and really any kind of jewellery). There are so many talented people around unafraid to showcase their unique styles, it’s an exciting time! So as you can imagine keeping this list short was tricky but I had to impose a limit or I’d be writing it for days. Enjoy! Hex Arcana Amuletic armour, designed and made in Melbourne. Each piece is created with the desire to instill a sense of strength and protection in each wearer, whether during daily life or ritual. Hex Arcana was born in 2017, forged from a love of the occult, alchemy, symbology, and all things dark and macabre. @hex_arcana Metal Couture Griffiths’ prolific output reveals a rich tapestry of historical and cultural influences, inspired by his own life experience. From gothic architecture, tattoo art and baroque ornament to the biomechanical, his bespoke creations range from delicate whispers of diamonds, daggers and swallows to massive, opulent cathedral rings, both distinctive and breathtaking to behold. @wlgmetalcouture Christina Gore @christinagorejewellery Corinne Lomon Corinne Lomon is trained in fine art, silversmithing and blacksmithing. She has a strong belief that jewellery is a form of personalised sculpture, which gains character and value with wear. @corinnelomon A Curious Elixir An alchemical transformation of pewter into unique artworks. Anatomical, heraldic and mythological themes embossed from sheet metal; textured, patinated, aged and polished, embellish with paint, gems and vintage illustrations. @acuriouselixir Jeka Kaat Jeka designs and creates modern tribal talismans, inspired by the world, urban and natural environments alike, activating the amazing shapes, textures and stories throughout her work. @jekakaat.jewellery Emma Rea Emma Rea jewellery is made in Melbourne using sustainable practices. At minimum, 70% of the silver used to create Emma Rea pieces is recycled and sourced from local purveyors. Using recycled silver alleviates our footprint on the planet by not using newly mined silver. @emma_rea Cut Off Your Hands Jewellery Alana Smith is a Ballarat based artist who works predominantly in sterling silver. Focusing heavily on texture, Alana is inspired by Brutalist architecture and likes to capture the roughness of eroded concrete structures in her work. @cutoffyourhandsjewellery Psychic Desert Psychic Desert was created in 2015 by Genie Desert when she began exploring the concept of wearable art as an extension of her fine art practice. Genie is fascinated by an ancient time when jewellery was more than an adornment but rather a talisman; a conduit for divine protection, which can involve both the attraction of positive energies to the wearer and the deflection of disease, danger and the evil eye. @psychic_desert Zoe Ace Metal Zoë works with sterling silver, gold and steel. She draws inspiration from the natural world, pagan mythology, fables, the punk, goth and metal music that she listens to, as well as the urban textures she encounters in daily life. @zoe.ace.metal_jewellery And then of course there’s yours truly and you can find my most Gothic inclined work here
Creating an Elfin Empress
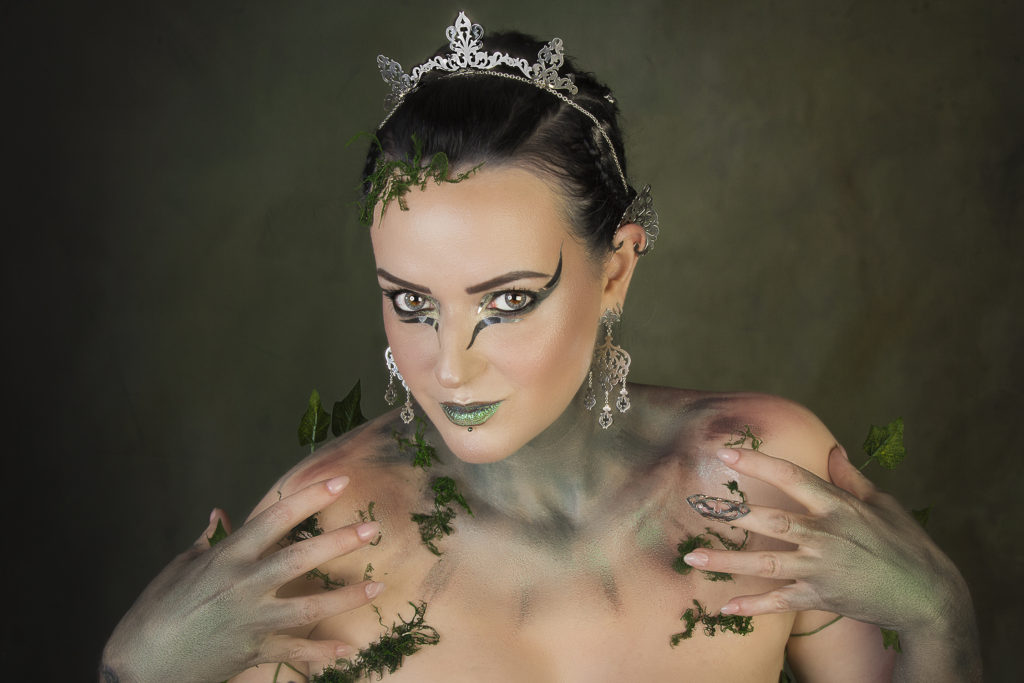
Wondering how to create the most regal Elfin Empress or forest Faerie Queen cosplay? Find out how Dragonfly and myself brought this fantasy costume to life from concept to photograph. https://www.skadijewellery.com/wp-content/uploads/2021/05/VID_128590218_072036_671.mp4 Just cutting out all of the elements took a couple of days! Skadi Jewellery Design ambassador Dragonfly came to me with a great idea a while back for some elf ear cuffs. I decided to make up for my slow progress in making them by adding a few trinkets, now here we are a couple of years later, she looks like an incredible elf warrior queen and I’m so proud to be part of it! Like most of our collaborations it started off with an offhand remark and snowballed into an elaborate project… Making the elf jewellery set This was my first attempt at ear cuffs so a bit of research was required. After trawling through hundreds of elaborate wire contraptions wrapping every which way around the ear my main takeaway was that I wanted to keep it simple! Every added element meant the cuffs were likely to fit on fewer ears sizes. Cut to several hours later with a desk and surrounding floor littered with cardboard prototypes and I finally had a simple spade shape which would sit comfortably on the top of the ear without falling off. I created the leafy scrollwork design to fit in with an enchanted forest theme and from that point the chandelier earrings design pretty much took care of itself! As with the elf ear cuffs, I wanted the crown to fit as many head sizes as possible and the only way to do that was to make it adjustable. I wanted to keep a fine lightweight appearance so I decided to use a chain to secure it to the head. The main section I divided into 3 so they could bend with the shape of the head. More than 10 hours of saw piercing followed by engraving, shaping, soldering and polishing and the shiny silver elf set was ready for it’s trip from Melbourne to Portugal! Styling, make-up & photography As soon as I told Dragonfly I was finally making her some elf ears she was immediately brimming with styling ideas! As a professional make-up artist, model, photographer and generally creative genius, I’m always happy to leave Dragonfly to her own devices and be completely surprised by whatever she comes up with. One of my favourite parts of the process is the anticipation and seeing those stunning photos for the first time with no idea what to expect. Of course this set was no exception! The enchanting forest monarch with a warrior edge which Dragonfly created with the jewellery I made is a mesmerising figure. I can’t wait to see what kind of character we come up with next! ‘Part of the process of becoming a professional make up artist was the need to improve my skills to do what I love most in the process of the photoshoots I make for each work . And Skadi was from our fist collab the biggest impulse I needed to accomplish my make up goals. In every Photoshoot I did for Clare I felt challenged to do something different and the weight of the responsibility to do justice to the beauty of each jewellery piece was getting bigger. With this particular shoot I feel really proud that I was” part” of the influence to make Clare do these elven ears. Since I saw Shannara Chronicles and the earcuffs Amberle used I was in love with it and I imagined how Clare would be able to do something similar and unique at the same time. And again we think as one and when she showed me the result it was exactly as I imagined In my head . I guess it’s really true ,”Great minds think alike”. I’m so grateful to represent Skadi as her ambassador and couldn’t be more proud. For this look I had the help of a friend who is so talented too and doesn’t know it as she should . Zélia from Penteados Veia Artística has such skills to make the most amazing braid hairstyles I think she should work full time on it. I think the hairstyle was a great help to make the look more badass . I wanted to create a mix of an Elf look but not a cute one, more like an warrior style . The look was entirely made freehand on the day . I didn’t even make a Facechart for it. I just bought face lace stickers and added them . I used a brand I’m addicted to and I think that also made a big difference. Danessa Myricks products are amazing and versatile, they worked perfectly on this look. I’m really proud with the results . I can’t wait to create our next character ‘ – Dragonfly If you would like to see past collaborations between Dragonfly and myself check out the gallery. See more of Dragonfly’s incredible make-up artistry and photography on her Instagram M.A.MAKEUP Elvin Empress ears Elfin empress crown elfin empress earrings
Time Saving Saw Piercing Techniques
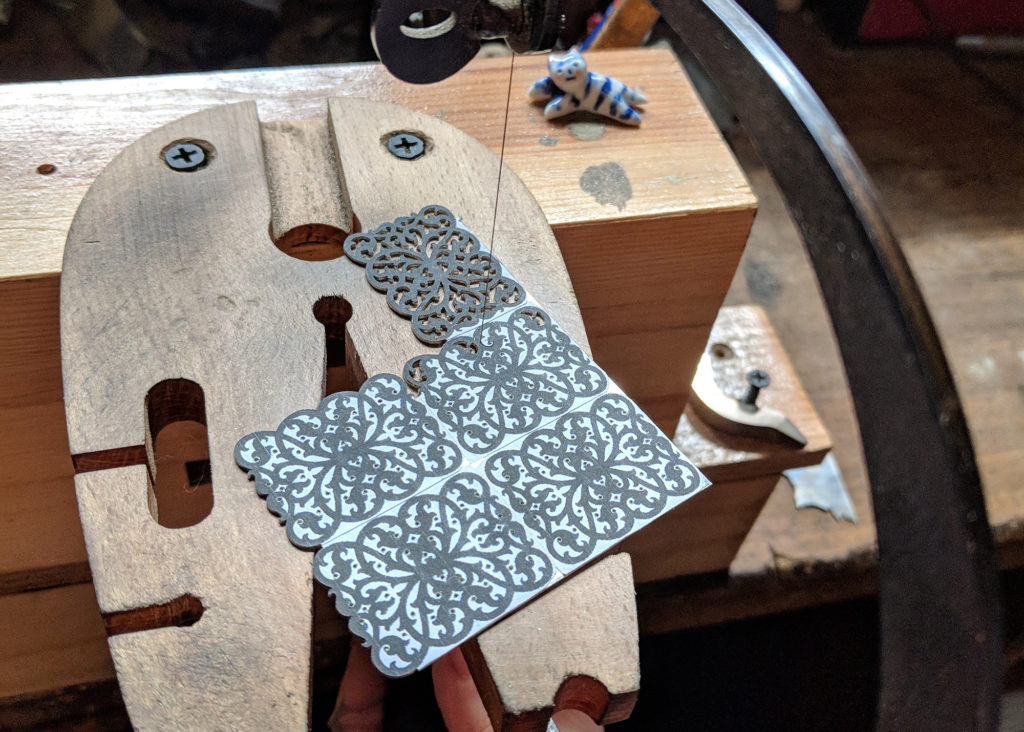
Are you learning how to saw pierce but you’re worried you’re missing something obvious? Here are some tricks, tips and saw piercing techniques I’ve picked up from over a decade of wielding a saw frame. While teaching saw piercing workshops I’ve been asked many questions which range from incredibly insightful to downright silly. Regardless of how obvious the answer may seem they’ve all been great and helpful in one way or another. For this post I’d thought I’d address some of the most commonly asked questions about saw piercing. Hopefully the answers will provide some tricks and saw piercing techniques which will save you time, effort and frustration! Note: if you’ve never done any saw piercing before it might be helpful to first read my post on how to start saw piercing. Print your design on sticker paper for a clear pattern to follow Sticker paper When I was first learning saw piercing I was told to use a glue stick to attach my paper design to the metal. Often half of it would come off while sawing and the rest was impossible to remove without acetone. It was a messy nightmare. I thought I’d take a shortcut and use sticker paper (postage labels work well) and haven’t looked back! It’s easy to draw or print your design on, stick directly to the metal and then just peel off when you’re done. Start on a point When deciding where to start cutting make it easy for yourself! If there is a point in your design start there, that way you will also be ending on a point and making the saw line match up perfectly is not so much of a concern. You should also make your drill hole close to this point so you don’t have far to go. Wherever possible give yourself at least a millimetre of space between the hole and your design so you can see what you’re doing and you don’t accidentally drill into the design.If there is no point, saw at a right angle up to the line with the most open space around it, turn 90 degrees and follow the line. When you come back around to finish the cut it will be easier to match the lines because you’ve left yourself a nice block of material (rather than an acute angle). Use the peg to steady your blade The bench peg is your friend! It’s not just there to lean on, you can also use the wood to help steady your blade. When beginning a cut your blade can slip around, simply put your blade against the wood then bring the metal up to the blade where you want to cut it. By cutting the first few strokes into both the wood and metal, the blade will obey your commands. This principle also works for finishing a cut. When your sawblade suddenly meets no resistance it can jump forward and cut into your design. All you need to do is again lean your sawblade against the wood of the peg for the last millimetre of your cut and it’s got no where to jump! Go from the inside out So you have several different compartments in your design and you’re wondering where to start? If you work from the centre outward, you’ll always have the most possible material to work with. If you cut around the outside first you’ve immediately shrunk your piece of metal and made it all the more difficult to hold and manoeuvre. Of course you always want to keep the piece of metal smaller than the depth of your saw frame or you’re going to get stuck. Check for broken blades If your blade is getting blunt instantly, 9 times out of 10 it’s because there’s a tiny piece of broken blade from your last one stuck in your metal. It’s worth getting into the habit of checking for little shards every time you break a blade because it will save you time, money and irritation in the long run. Leave the top of the blade locked When loosening one end of the blade to move it from one compartment to another, I find it easier to release the bottom screw and leave the top alone. There are a few reasons for this; the first is that you will then be threading the blade through the top of your metal so you can see exactly which hole it’s going into. The second is that if you release one end of the blade while not holding the metal it’s going to slide off rather quickly and you’re much less likely to lose it if it’s slides towards rather than away from you. And finally, I just find it easier to loosen and tighten the bottom screw because it’s closer to me 😉 Cut from the inside out unless your piece is too big for your sawframe Make sure your setup makes you comfortable Invest in the right set up I could write for days on the subject of creating the right setup for your long term comfort but it’s going to be different for everyone. It’s probably going to be a case of trial and error to find what’s perfect for you but I have some suggestions to get you started. If you want to be sitting down, take the time to find a comfortable chair which forces you to sit upright and holds you at the correct height for your bench. For some this may mean a fancy office chair or kneeling chair. Either way if it’s adjustable that will probably help! I personally like to stand up while I’m sawing as this causes the least amount of back and neck strain and it’s easy to move around. Catch your scraps Particularly now when gold and silver are getting so expensive you don’t want to waste anything! With my standing setup I have a little drawer under my bench peg which I can open while saw piercing
Artist Feature: Dragonfly
It’s been 3 years since I made the announcement that the model Dragonfly was the Skadi Jewellery Design Ambassador. Already ridiculously talented as a model, photographer and concept designer, Gui has since upskilled to professional make-up artist as well! She displays all of her incredible skills in the Winter Sprite photoshoot taken recently for the upcoming Christmas season and featuring the Falling Snow jewellery range. https://www.skadijewellery.com/wp-content/uploads/2020/10/video-1601832128.mp4 Collaboration with Photographer, Make-Up Artist & Model Dragonfly I’ve been collaborating with Gui (model Dragonfly) for 5 years now! And every shoot is a surprise and delight. From demons to snow queens, vampires to fauns, I can always trust Gui to come up with and execute an amazing concept. I feel guilty that all I have to do is make the jewellery. Working with someone you’ve never met in person on the other side of the world should probably be daunting. But I say it can’t hurt to try! What if you find someone with matching ideals and aesthetics but a completely unique perspective? You might create something extraordinary together! Of course remember to do your homework before sending off all your worldly goods, but be open to new opportunities. Dragonfly also works with some other amazing brands so be sure to check out her full catalogue. Winter Sprite If you’ve perused the gallery page of this website or you’re already familiar with Dragonfly’s work, you already know how versatile and creative she can be. What you may not see without looking more closely is her ingenuity. I was absolutely delighted to find out she had put together the entire Winter Sprite photoshoot in less than a day in Portugal while I was sleeping in Australia. How is this possible you wonder? To achieve the right Winter ambience Dragonfly used some of her Christmas decorations as props as well as in her make-up and hair. Admittedly she has very tasteful decorations, but being told that after viewing a stunning piece of editorial photography made me very happy. And it won’t surprise you to hear then that she also decorated her entire house from floor to ceiling. I believe the feature colour is silver, as it should be. In this shoot Dragonfly models the Falling Snow range of hand pierced silver snowflake necklace, earrings and ring.

