Would you like to learn how to saw pierce metal in order to make your own jewellery? Follow this beginner’s guide to saw piercing to get started with a valuable skill which requires minimal tools and expense.
Like many people around the world right now I’m staying home in an effort to reduce the speed of the spread of coronavirus. For me that means having a lot of spare time I never imagined having and I intend to make the most of it! Apart from actually taking the time to relax occasionally with a book, I’m hoping to learn some new skills and give myself the chance to be creative. Knowing that so many of you are in the same boat I wanted to share some of my knowledge and experience in saw piercing.
Usually I teach these skills in an in person workshop where I can guide the students, share tips and tricks, answer questions and help them refine their technique. Unfortunately written instructions will never be as thorough, but hopefully my basic guide below will help you get started. Whether it leads to an afternoon of amusement or starts you on the journey to being a sawing master, I encourage you to have a go!
A beginner's guide to saw piercing
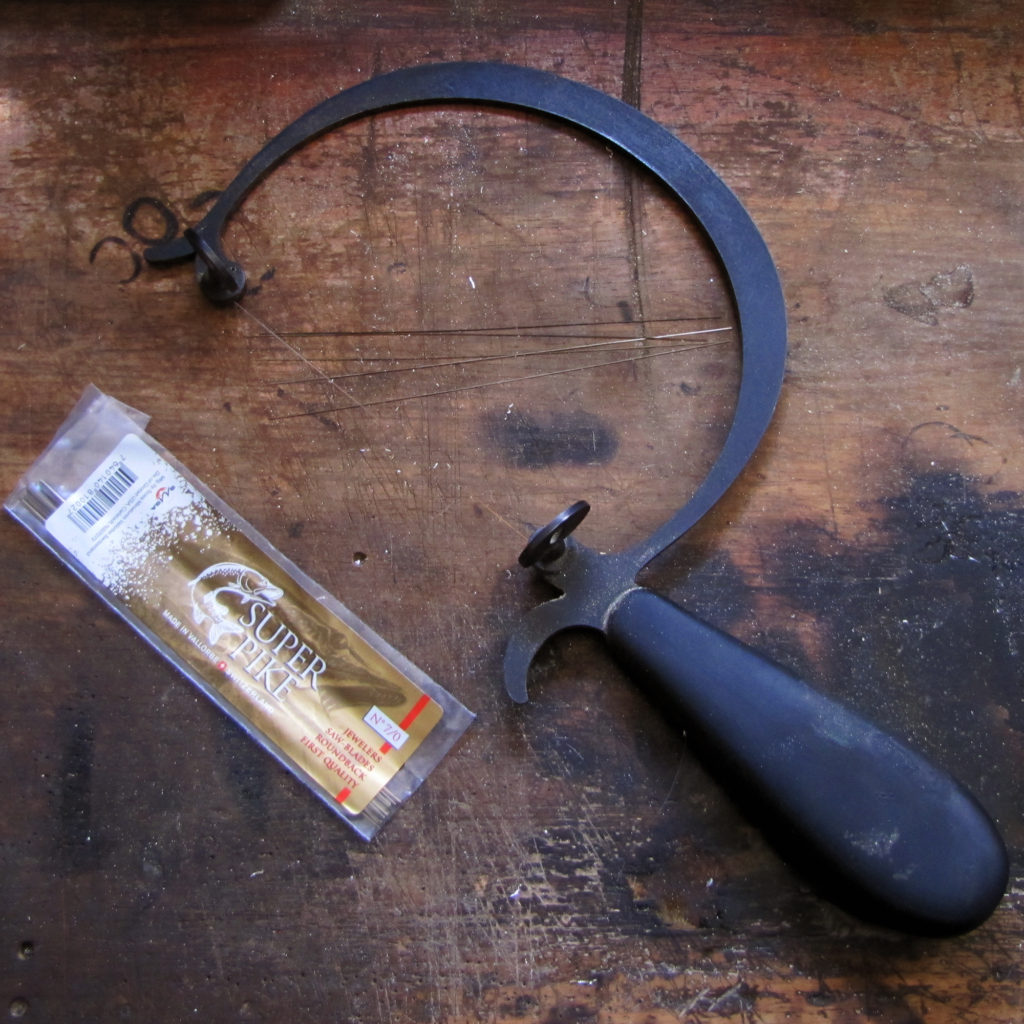
Choosing the Right Sawblade
Thickness of metal vs intricacy of design
When deciding which blade to use for a piece, it’s important to consider a number of things. While it can often take trial and error to get just the right one, understanding your materials and design makes it a lot easier.
Thicker sawblades are more resilient and will cut through metal faster, but they remove more material and don’t turn easily. The thicker the blade, the further apart the teeth. This makes them most appropriate for thick metal or very simple designs that don’t feature high detail, tight corners or small compartments within the design. Thicker sawblades are a poor choice for thin metal as the teeth will often get caught.
Thinner sawblades, by comparison, are much more accurate and easier to control. They’re ideal for very intricate, highly detailed designs, but they break easily and cut more slowly through thick metal.
Choosing the Right Frame
Sawframes
Different sawframes are suited for different jobs. A sawframe with more depth (the space between the blade and the parallel back edge of the saw) is ideal for cutting larger pieces of metal, but doesn’t offer a lot of accuracy, as your eyeline will be further from the metal whilst cutting. A more shallow sawframe will offer more control on smaller and more elaborate pieces, but may have difficulty cutting long straight lines.
Loading the sawblade
If a blade is stretched too tight, it will break easily. If not tight enough, it won’t cut effectively or accurately and is also more liable to break. When loading the blade, first ensure the teeth are slanting downwards toward the handle of the sawframe. Place the top of the blade into the top clamp of the sawframe and tighten the screw. To get a good blade tension, gently push the top of the frame against your bench while placing the bottom of the blade into the bottom clamp of the frame and tightening the screw.
Preparing the metal
Selecting the right metal thickness for the job
As thinner metals are easier and faster to cut through, they’re usually the most enjoyable to work with – not always the most appropriate though! Metal with a thickness of 0.3 – 0.5 mm is great for incredibly intricate designs and any jewellery for which weight is a necessary consideration (such as earrings.)
0.6 – 0.8 mm thickness works well for things like pendants, which require structural integrity without being too heavy. For rings, metal with a thickness of 0.7 mm+ is more appropriate as they tend to get knocked about the most. If you have a very intricate design which needs more structural integrity, layering is a good way to avoid compromising your design without adding hours to your making time. Simply cut out your detailed design in thin sheet then rivet or solder it to a thicker sheet.
Applying the design
There are two main methods of applying a design to the surface of your metal so you have lines to follow. The first is to lightly engrave your design onto the metal then cut it out. This works well if you just need to cut out a basic shape, but for a more complex design you may find yourself going a little cross-eyed trying to focus on the fine and often subtle engraved lines. If you don’t follow the lines perfectly, you may also find yourself spending a long time sanding out the engraving lines from the surface of your metal.
For lines with a higher contrast which are easier to follow over a long period of time, sticker paper is the way to go! You can draw your design onto the sticker paper, cut it out and apply it straight to the metal, giving you an easy and accurate guide to follow. Sticker paper is also great if you have a design which you’d like to duplicate as you can simply print multiple versions.
Drilling holes
If you have compartments within your design which need to be cut out you’ll need to drill holes through which you can thread your sawblade. You shouldn’t need a drill bit any larger than 1mm, as sawblades are nice and small. Additionally, a smaller hole will take less time to drill and reduce the risk of drilling into your design. If the interior section of your design features a sharp point within the compartment try to put the hole close to it – this will be the best place to start cutting.
When drilling, make your action smooth and decisive. Being slow and apprehensive is a good way to break drill bits! If you’re drilling a thick piece of metal you may need to drill halfway through, withdraw, and then drill the rest of the way (especially when using a small drill bit). It also helps to lubricate the drill bit so it doesn’t heat up too much and lose it’s cutting edge.
Adjusting your bench peg to the right height
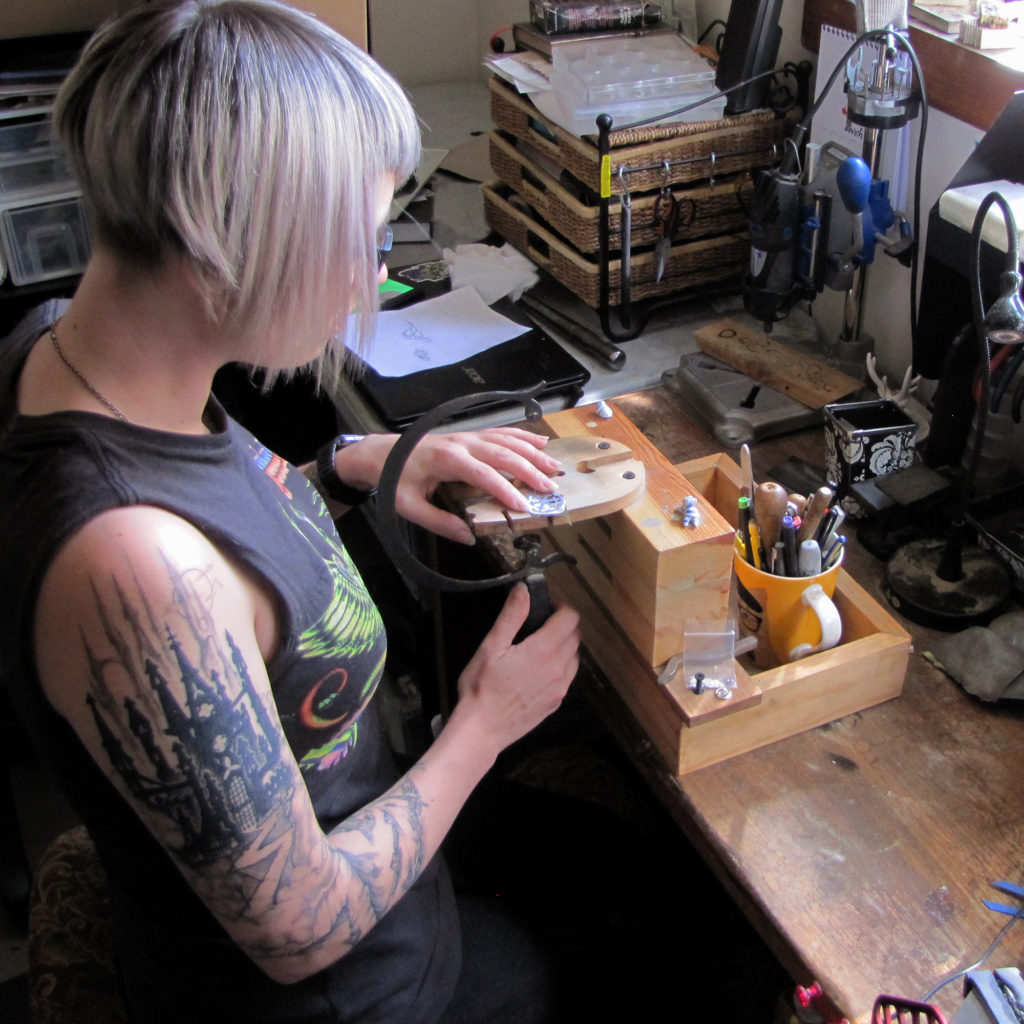
Making sure your metal is in the right position will enable you to cut more accurately, efficiently and comfortably. If it’s too far away you won’t be able to see the design properly and you’ll strain your back, too close and you’ll smack yourself in the face with the sawframe.
Ideally, your arm should be by your side with your elbow at a 90˚ angle. With your arm in this position while holding your sawframe, the bench peg should line up with the middle of your blade.
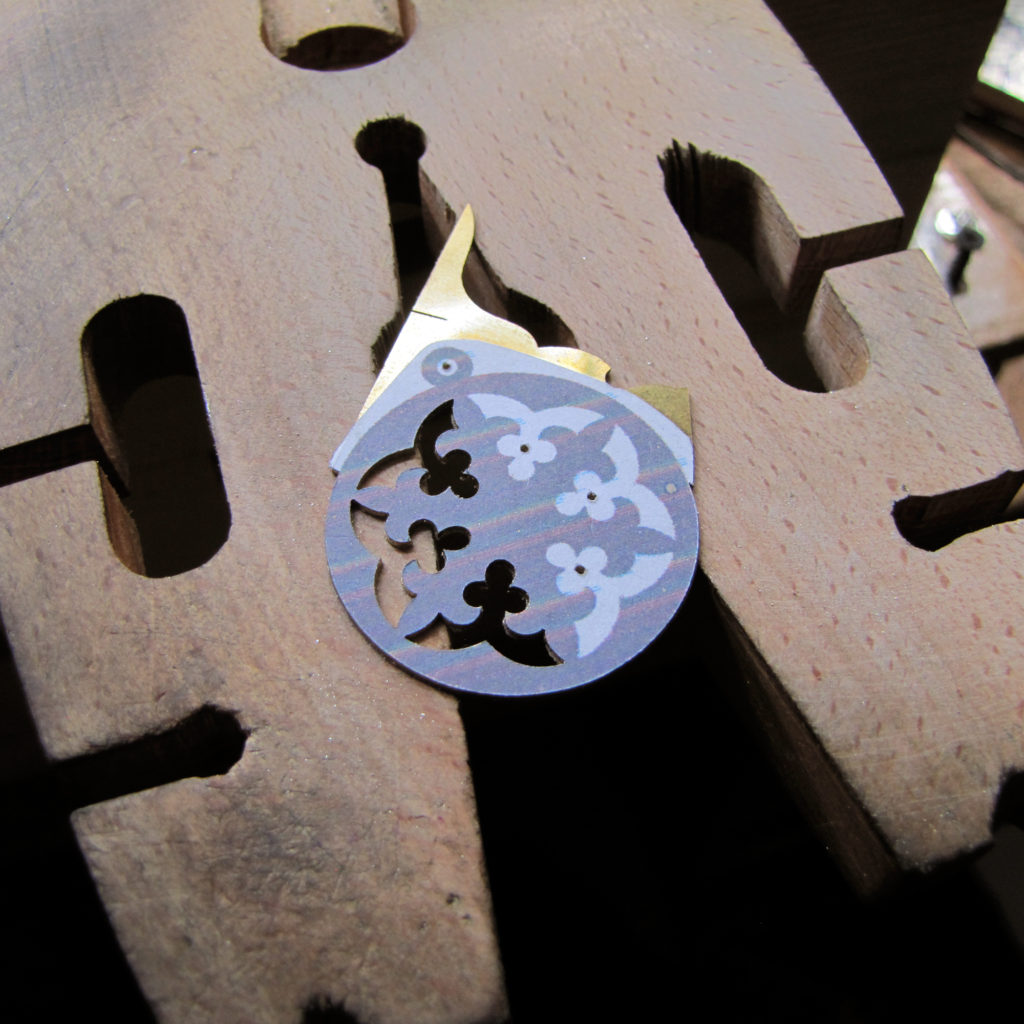
It’s time to cut!
Keep the frame upright
Holding the frame at a 90˚ angle to the metal ensures a more accurate cut. When you tilt the frame back or forward it becomes more difficult to control the blade, and you won’t get a nice straight edge on your metal. It also puts more strain on your body.
Don’t push, let the teeth do the work
Take it slowly, speed and control come with practice. If you push the blade too hard, you’ll find it disobeys your instructions and can go off in random directions or simply break. If you find your blade going off course, slow down and make sure you’re not pushing. As long as you’re moving the blade up and down you’ll find the teeth do the work for you.
Hold the handle lightly
If you grip the handle of the sawframe too tightly you’ll be much, much more likely to break all your blades. You want to be guiding the frame, rather than forcing it. There’s no need to treat it aggressively.
Use long smooth strokes
When cutting, try to use the entire length of your blade with long smooth strokes. By using the whole blade you’ll make it last longer as you won’t blunt and cause excess strain to one small section (it will be sharper for longer and less likely to break).
Turn the metal, not the sawframe
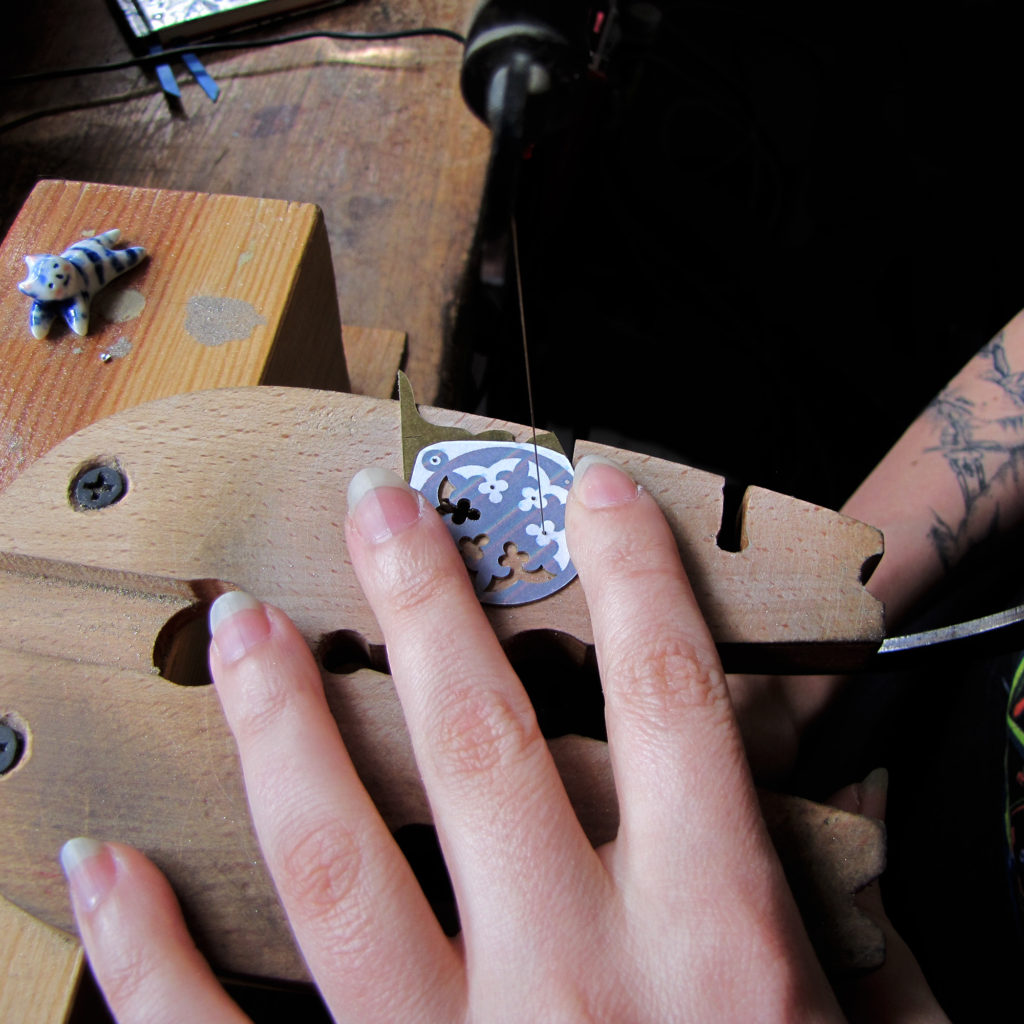
For the greatest accuracy, comfort and least effort while sawing it’s best to rotate the metal rather than your sawblade when your line turns. Ideally, your saw should only ever move up and down, pointing straight ahead.
When you get to an angle and you need to turn on the spot, slowly move the blade up and down while rotating the metal into the new direction (be sure not to push the blade as you are essentially creating a tiny hole for the blade to rotate within.)
Keep your fingers away from the blade
The best way to hold and control the piece of metal is to have your index finger and middle finger either side of where you’re cutting with more than a finger’s width of space between your middle finger and the blade. Also try to pay attention to where your head is; you should be close enough to see what you’re doing but not so close you’re going to knock your teeth out.
Following the lines
Following the lines in your design is like driving a car – don’t look where you are but where you’re going. Trust your hands. You’ll find that if you look slightly ahead of your sawblade rather than focusing on the sawblade itself, you can better judge any necessary adjustments and with a little practise your hand automatically follows where your eyes direct.
If you’re getting angry walk away
Saw piercing can be extremely relaxing and therapeutic, but sometimes you might get a few dud sawblades or find you have difficulty getting into the groove. If you find yourself getting frustrated, go and have a cup of tea or stroke a cat. If you saw pierce angry you’ll only break more blades or find yourself using naughty words other people don’t appreciate!
When you break a sawblade
When you break a sawblade there may be a small shard of the blade left behind, stuck in the metal. Be sure to check for and remove any piece of a broken blade. This is super important, as if you start cutting with the new blade and hit a piece of the old one you’ll immediately blunt the new one, rendering it useless.
Files are your friend
Sometimes while cutting, your start and end point may not line up exactly. If this happens, you can just use a small file to get rid of any knobbly bits.
Persistence and patience are the key. I promise that in time you will find saw piercing relaxing. And remember that if you stick at it long enough you’ll be able to cut out any design that you can dream up which means infinite possibilities for your jewellery!
If you want to practice your newly acquired skills check out the tutorial below:


Super terrific tutorial!! Very thorough. Thank you so much for sharing your skills!!!
My pleasure Kevlyn! I hope they help you improve your skills 🙂